> ## Documentation Index
> Fetch the complete documentation index at: https://portkey-docs-add-third-party-integration-issues-fixes.mintlify.site/llms.txt
> Use this file to discover all available pages before exploring further.
# vLLM
> Integrate vLLM-hosted custom models with Portkey and take them to production
Portkey provides a robust and secure platform to observe, govern, and manage your **locally** or **privately** hosted custom models using vLLM.
Here's a [list](https://docs.vllm.ai/en/latest/models/supported_models.html) of all model architectures supported on vLLM.
## Integrating Custom Models with Portkey SDK
Expose your vLLM server by using a tunneling service like [ngrok](https://ngrok.com/) or any other way you prefer. You can skip this step if you’re self-hosting the Gateway.
```sh theme={null}
ngrok http 11434 --host-header="localhost:8080"
```
```sh theme={null}
npm install --save portkey-ai
```
```sh theme={null}
pip install portkey-ai
```
1. Pass your publicly-exposed vLLM server URL to Portkey with `customHost` (by default, vLLM is on `http://localhost:8000/v1`)
2. Set target `provider` as `openai` since the server follows OpenAI API schema.
```js theme={null}
import Portkey from 'portkey-ai'
const portkey = new Portkey({
apiKey: "PORTKEY_API_KEY",
provider: "openai",
customHost: "https://7cc4-3-235-157-146.ngrok-free.app" // Your vLLM ngrok URL
Authorization: "AUTH_KEY", // If you need to pass auth
})
```
```python theme={null}
from portkey_ai import Portkey
portkey = Portkey(
api_key="PORTKEY_API_KEY",
provider="openai",
custom_host="https://7cc4-3-235-157-146.ngrok-free.app" # Your vLLM ngrok URL
Authorization="AUTH_KEY", # If you need to pass auth
)
```
More on `custom_host` [here](/product/ai-gateway/universal-api#integrating-local-or-private-models).
Use the Portkey SDK to invoke chat completions from your model, just as you would with any other provider:
```js theme={null}
const chatCompletion = await portkey.chat.completions.create({
messages: [{ role: 'user', content: 'Say this is a test' }]
});
console.log(chatCompletion.choices);
```
```python theme={null}
completion = portkey.chat.completions.create(
messages= [{ "role": 'user', "content": 'Say this is a test' }]
)
print(completion)
```
## [Using Virtual Keys](https://app.portkey.ai/virtual-keys)
Virtual Keys serve as Portkey's unified authentication system for all LLM interactions, simplifying the use of multiple providers and Portkey features within your application. For self-hosted LLMs, you can configure custom authentication requirements including authorization keys, bearer tokens, or any other headers needed to access your model:
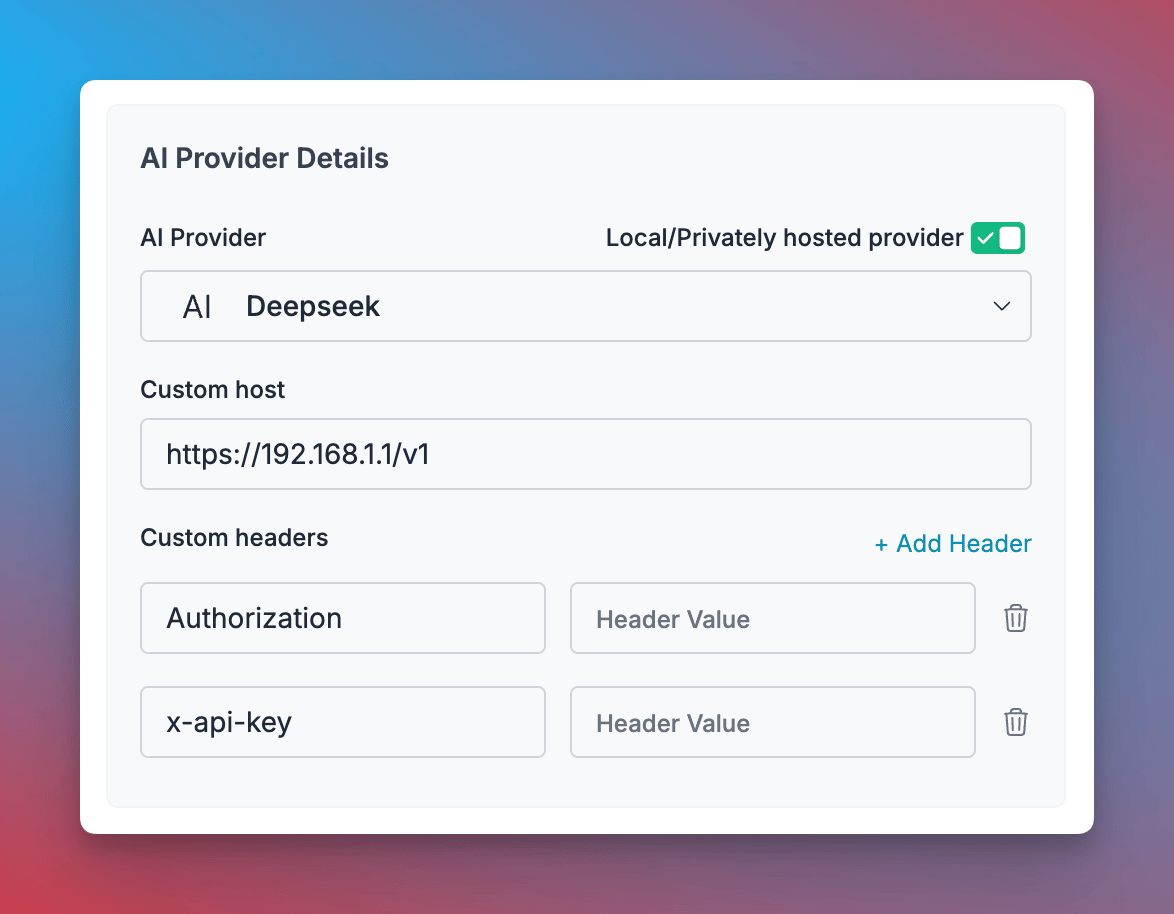 1. Navigate to [Virtual Keys](https://app.portkey.ai/virtual-keys) in your Portkey dashboard
2. Click **"Add Key"** and enable the **"Local/Privately hosted provider"** toggle
3. Configure your deployment:
* Select the matching provider API specification (typically `OpenAI`)
* Enter your model's base URL in the `Custom Host` field
* Add required authentication headers and their values
4. Click **"Create"** to generate your virtual key
You can now use this virtual key in your requests:
```js theme={null}
const portkey = new Portkey({
apiKey: "PORTKEY_API_KEY",
virtualKey: "YOUR_SELF_HOSTED_LLM_VIRTUAL_KEY"
async function main() {
const response = await client.chat.completions.create({
messages: [{ role: "user", content: "Bob the builder.." }],
model: "your-self-hosted-model-name",
});
console.log(response.choices[0].message.content);
})
```
```python theme={null}
portkey = Portkey(
api_key="PORTKEY_API_KEY",
virtual_key="YOUR_SELF_HOSTED_LLM_VIRTUAL_KEY"
)
response = portkey.chat.completions.create(
model="your-self-hosted-model-name",
messages=[
{"role": "system", "content": "You are a helpful assistant."},
{"role": "user", "content": "Hello!"}
]
print(response)
)
```
For more information about managing self-hosted LLMs with Portkey, see [Bring Your Own LLM](/integrations/llms/byollm).
## Next Steps
Explore the complete list of features supported in the SDK:
***
You'll find more information in the relevant sections:
1. [Add metadata to your requests](/product/observability/metadata)
2. [Add gateway configs to your requests](/product/ai-gateway/universal-api#ollama-in-configs)
3. [Tracing requests](/product/observability/traces)
4. [Setup a fallback from OpenAI to your local LLM](/product/ai-gateway/fallbacks)
1. Navigate to [Virtual Keys](https://app.portkey.ai/virtual-keys) in your Portkey dashboard
2. Click **"Add Key"** and enable the **"Local/Privately hosted provider"** toggle
3. Configure your deployment:
* Select the matching provider API specification (typically `OpenAI`)
* Enter your model's base URL in the `Custom Host` field
* Add required authentication headers and their values
4. Click **"Create"** to generate your virtual key
You can now use this virtual key in your requests:
```js theme={null}
const portkey = new Portkey({
apiKey: "PORTKEY_API_KEY",
virtualKey: "YOUR_SELF_HOSTED_LLM_VIRTUAL_KEY"
async function main() {
const response = await client.chat.completions.create({
messages: [{ role: "user", content: "Bob the builder.." }],
model: "your-self-hosted-model-name",
});
console.log(response.choices[0].message.content);
})
```
```python theme={null}
portkey = Portkey(
api_key="PORTKEY_API_KEY",
virtual_key="YOUR_SELF_HOSTED_LLM_VIRTUAL_KEY"
)
response = portkey.chat.completions.create(
model="your-self-hosted-model-name",
messages=[
{"role": "system", "content": "You are a helpful assistant."},
{"role": "user", "content": "Hello!"}
]
print(response)
)
```
For more information about managing self-hosted LLMs with Portkey, see [Bring Your Own LLM](/integrations/llms/byollm).
## Next Steps
Explore the complete list of features supported in the SDK:
***
You'll find more information in the relevant sections:
1. [Add metadata to your requests](/product/observability/metadata)
2. [Add gateway configs to your requests](/product/ai-gateway/universal-api#ollama-in-configs)
3. [Tracing requests](/product/observability/traces)
4. [Setup a fallback from OpenAI to your local LLM](/product/ai-gateway/fallbacks)